> For the complete documentation index, see [llms.txt](https://faultx.gitbook.io/rn10p-docs/llms.txt). Markdown versions of documentation pages are available by appending `.md` to page URLs; this page is available as [Markdown](https://faultx.gitbook.io/rn10p-docs/tools/adb-and-fastboot.md).
# ADB & Fastboot
{% hint style="warning" %}
### Warning
Attention to the installation steps properly
{% endhint %}
### :microsoft: Windows
Read Tutorial
#### Step 1
Download & extract:
adb-setupMi Unlock Tools
#### Step 2
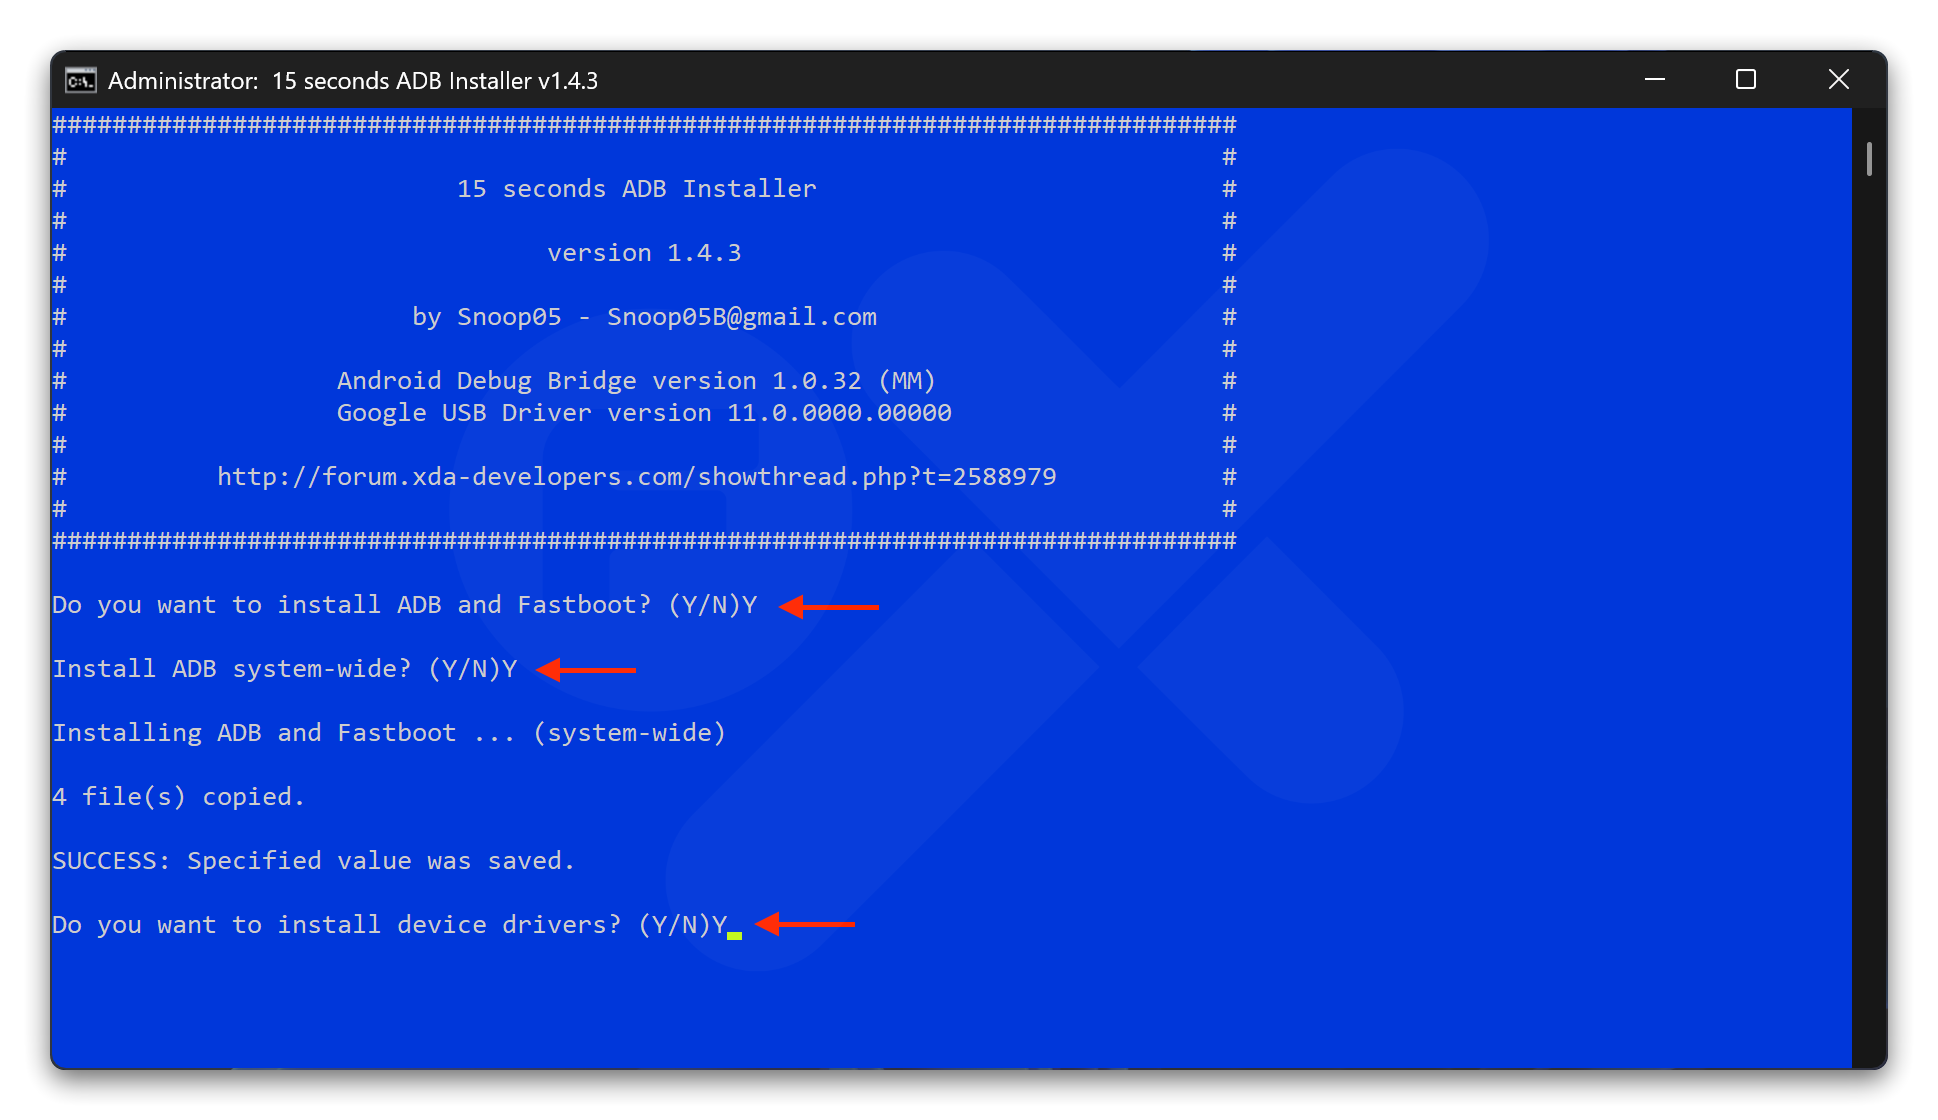
Double click ➜ `adb-setup-1.4.3.exe`\
Then press the key ➜ **Y**\
\&#xNAN;*See the image below*
#### Step 3
Make sure ➜ :square-check: *Always trust software from “Gooogle Inc”* , Then click **“Install”**
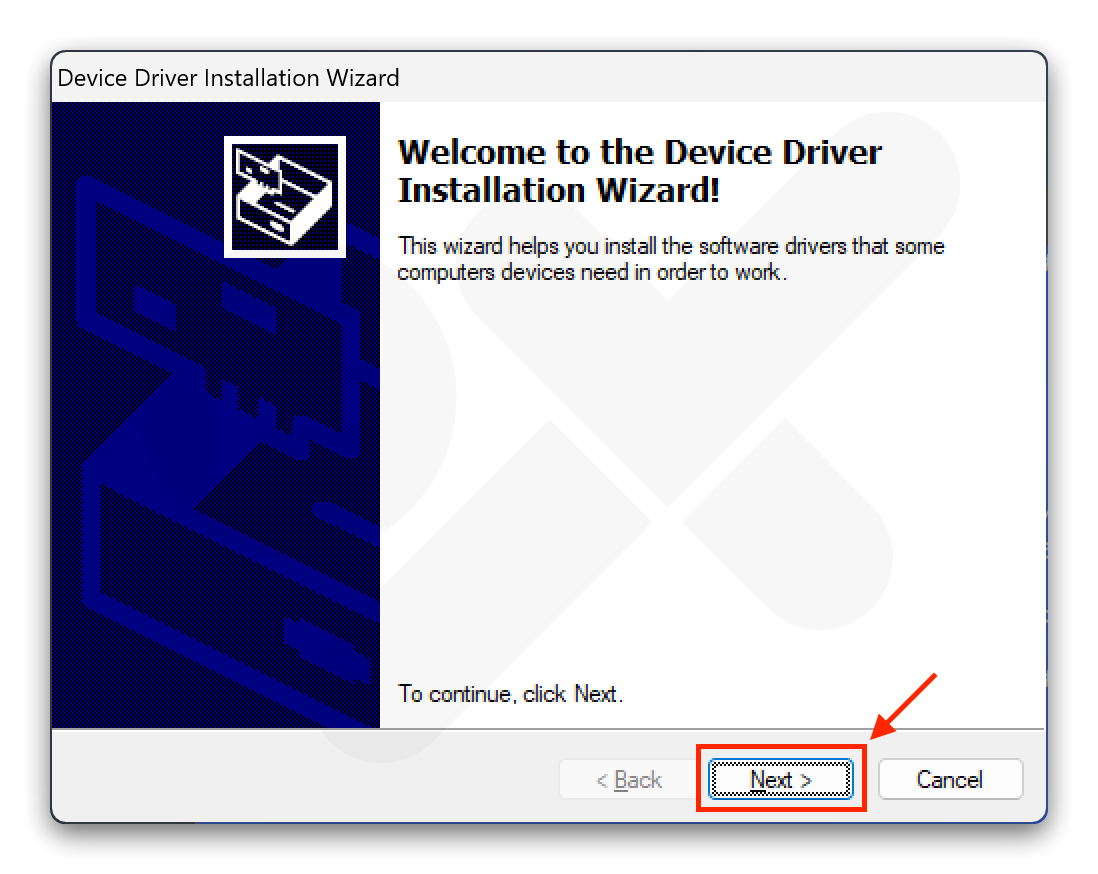
#### Step 4
Click ➜ **Next**
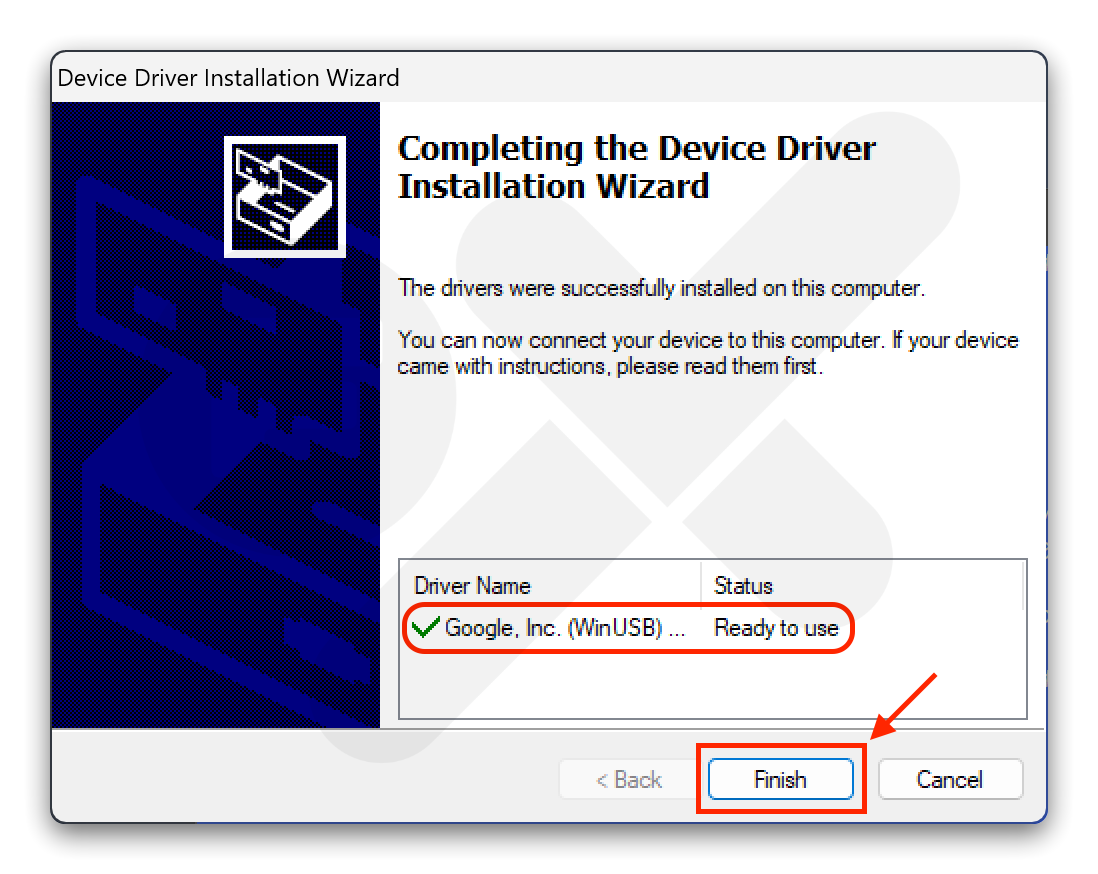
#### Step 5
The message “Ready to use” will appear. Click **“Finish”**
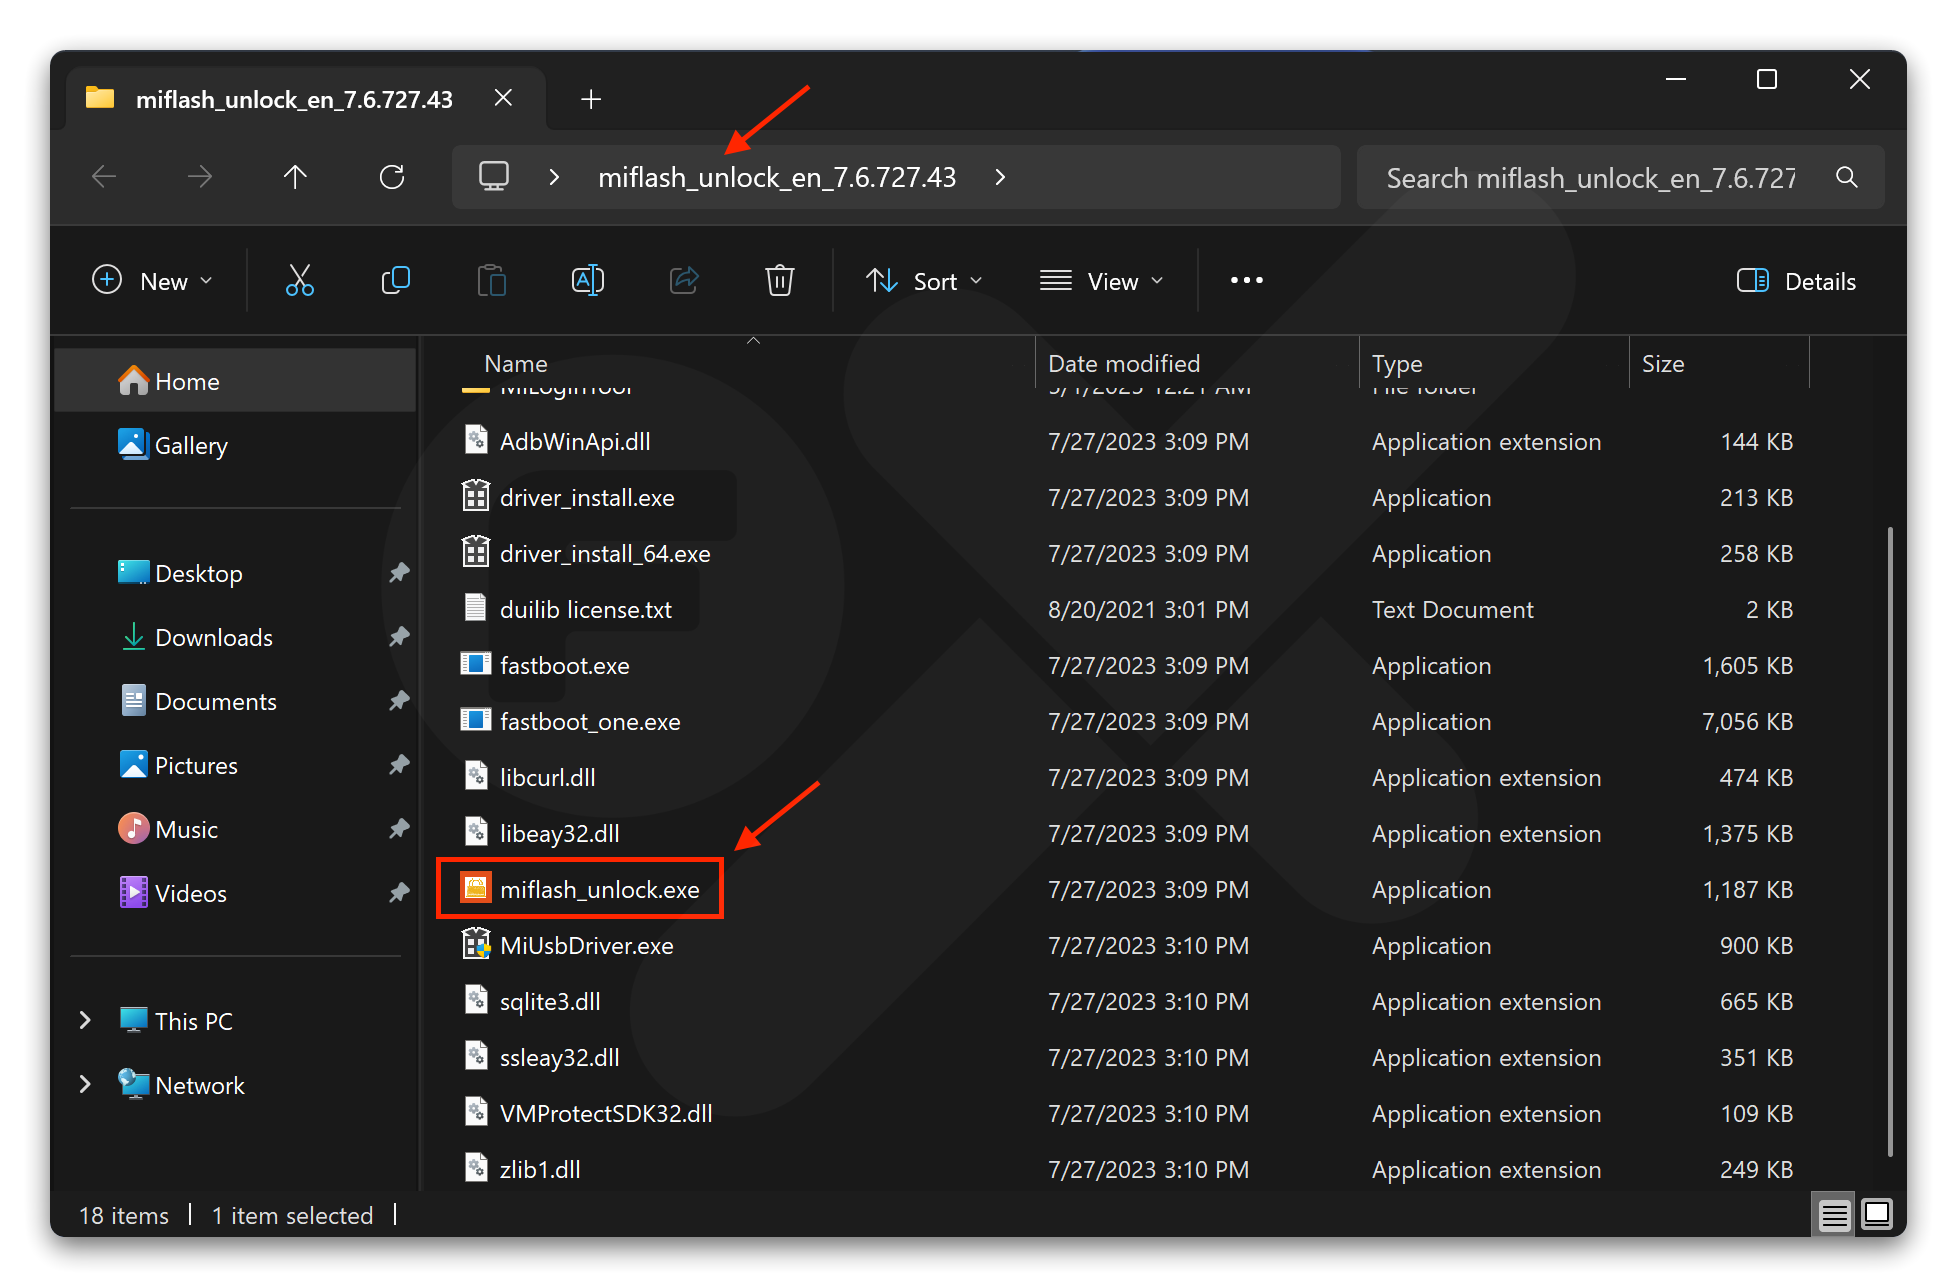
#### Step 6
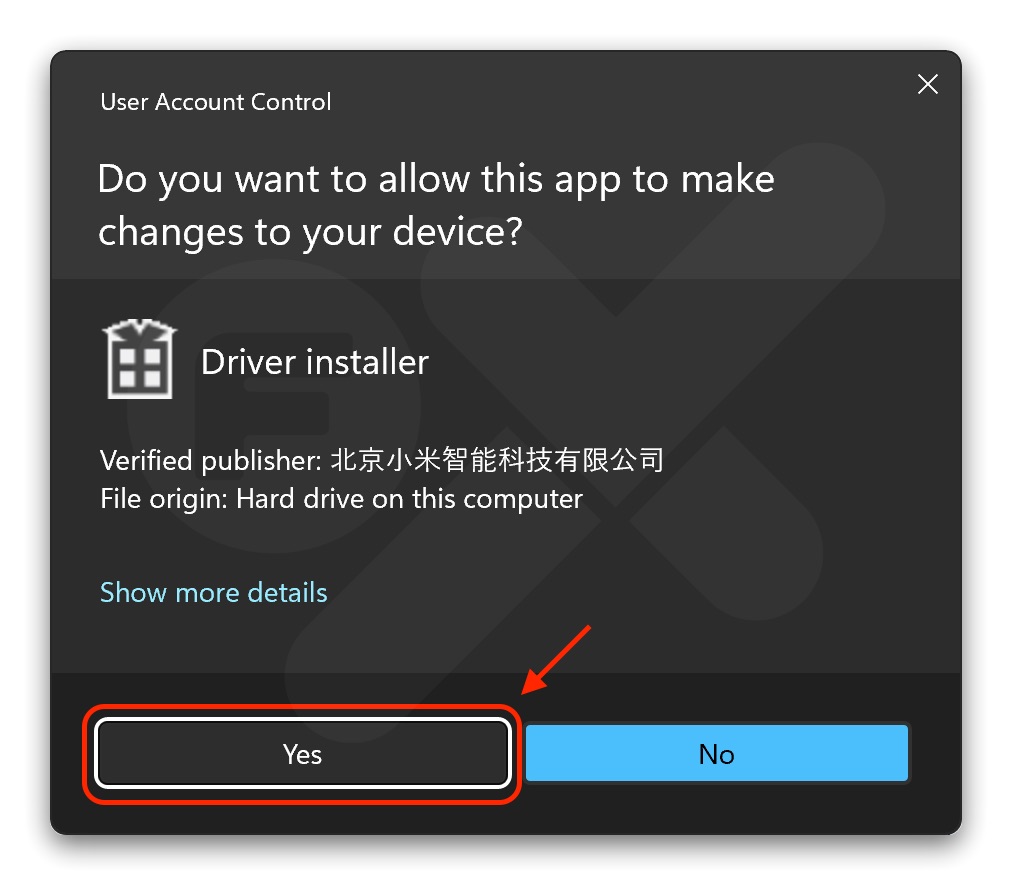
Double click **miflash\_unlock.exe**
#### Step 7
#### Step 8
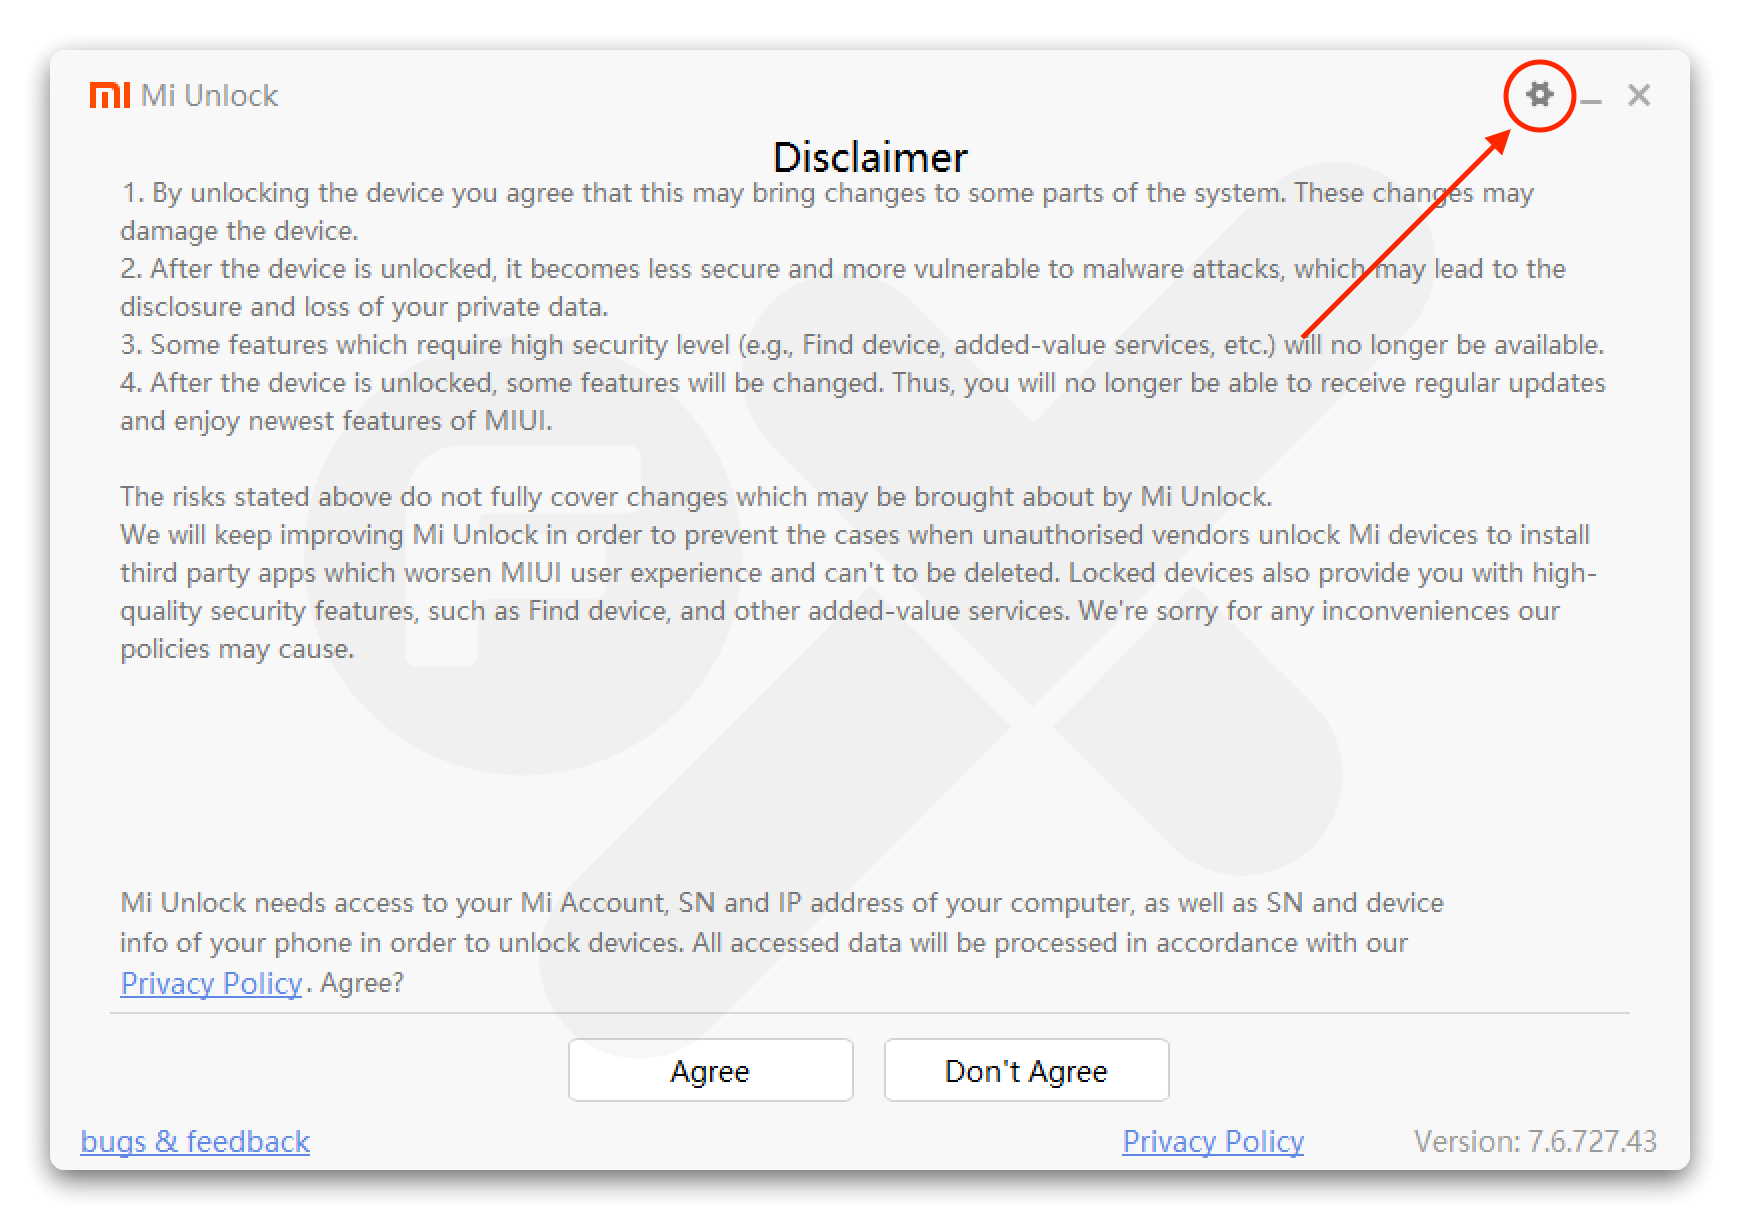
Click the :gear: icon (see the red circle)
#### Step 9
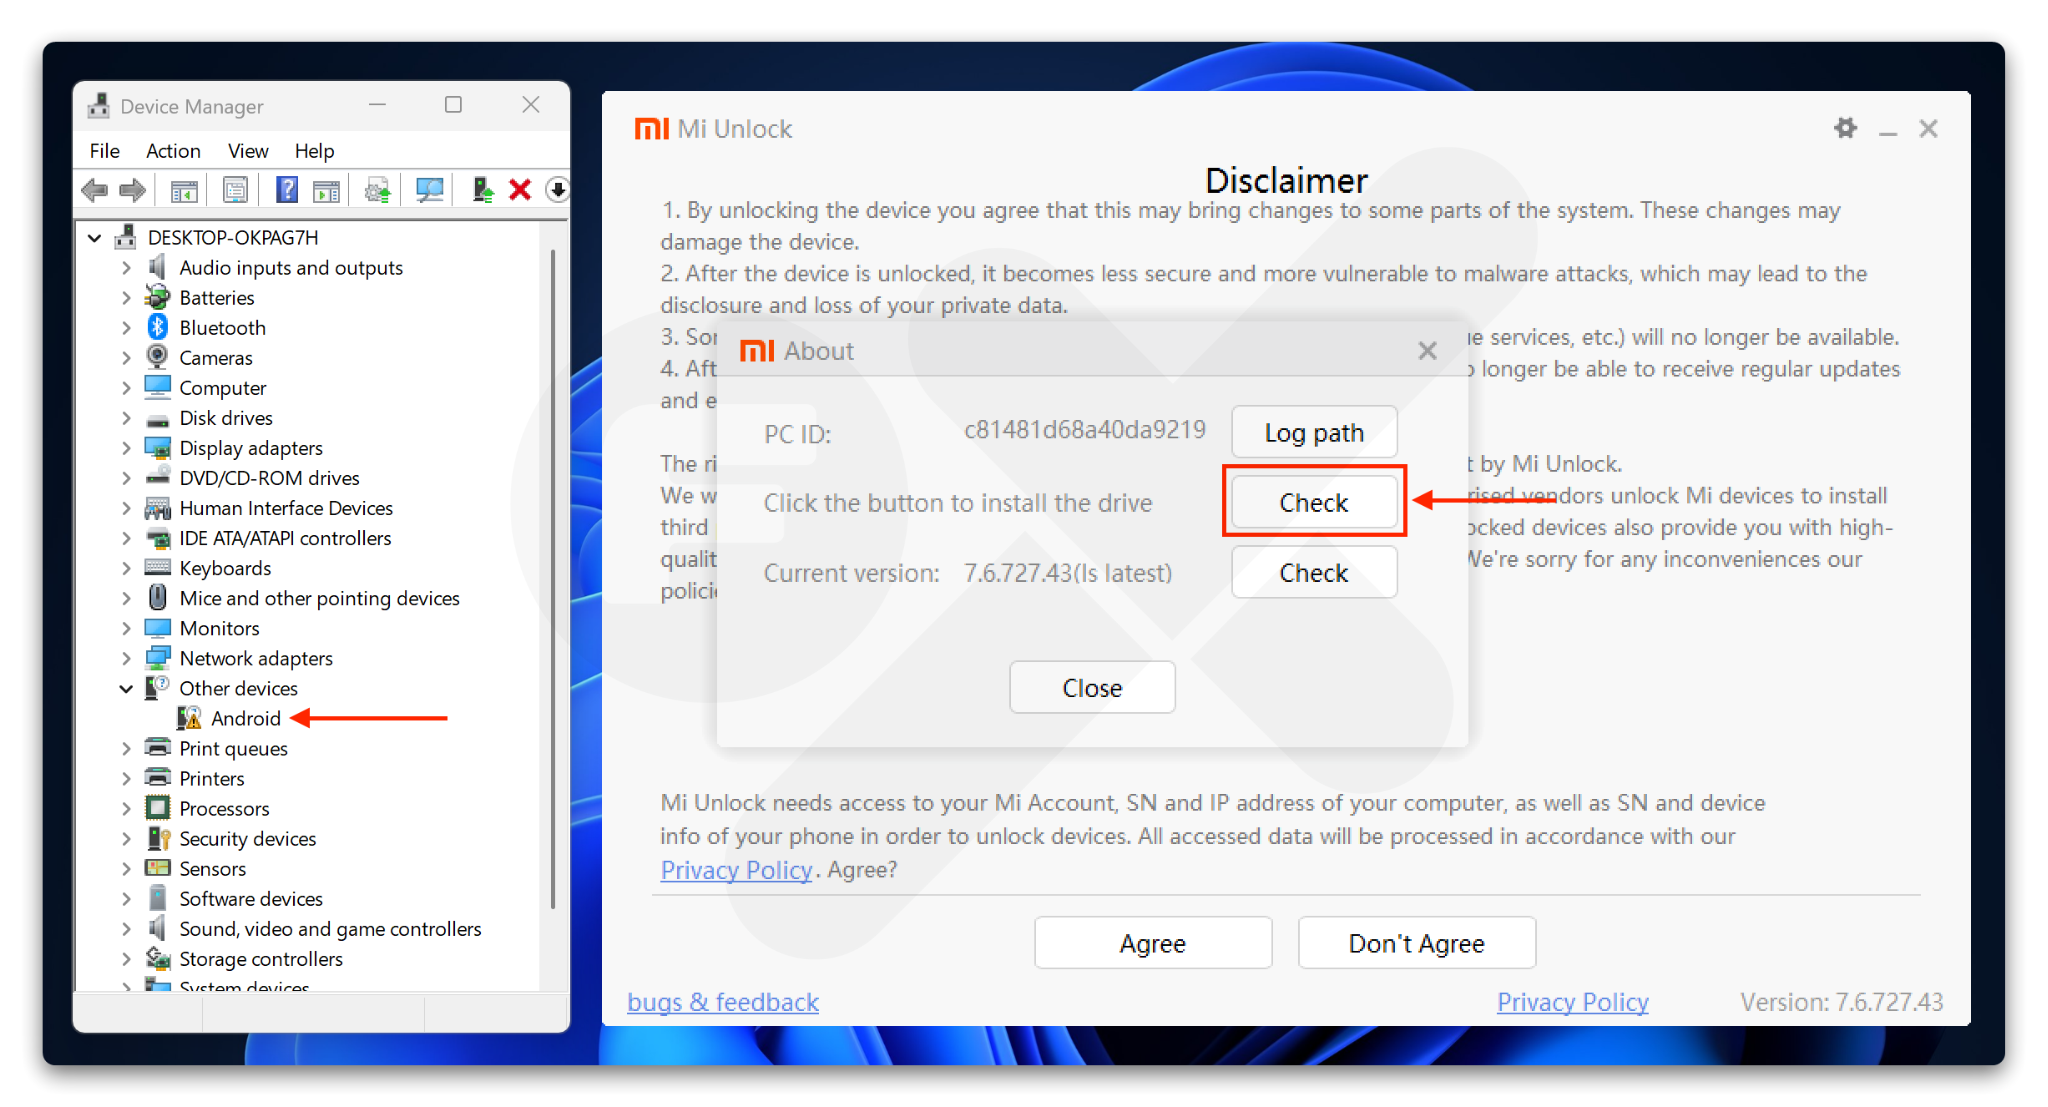
* Open **Device Manager** (Click the **Start** button (Windows logo) ➜ Type **Device Manager** in the search bar ➜ Click on the **Device Manager** result)
* Connect your device to the computer via USB cable
* If Device Manager shows \[ :triangle-exclamation: Android ] it means the fastboot driver has not been installed correctly
* Click ➜ **Check** *“Click the button to install drive”*
#### Step 10
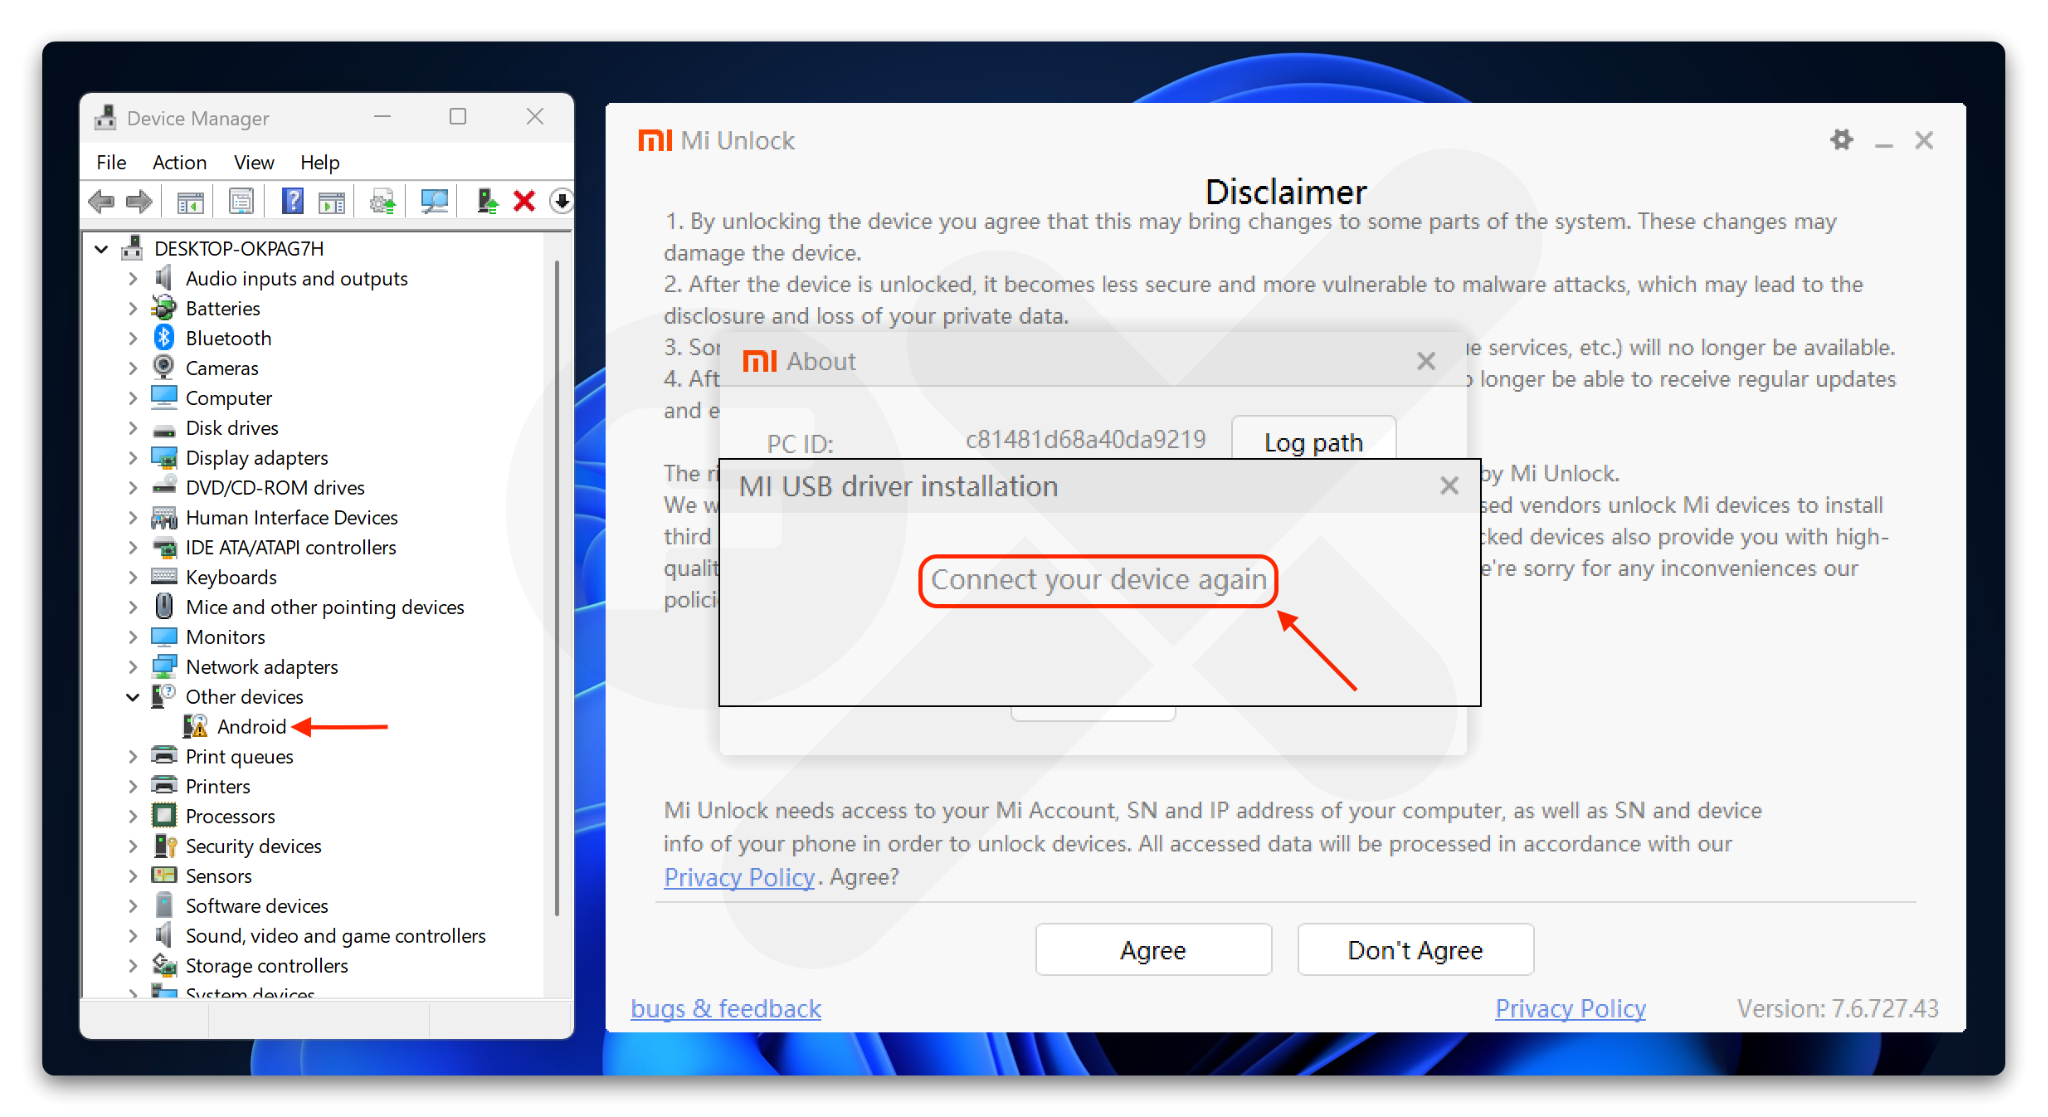
* If it says **“Connect your device again”**, unplug the USB and reconnect your device to the computer
* The driver should then install automatically
#### Step 11
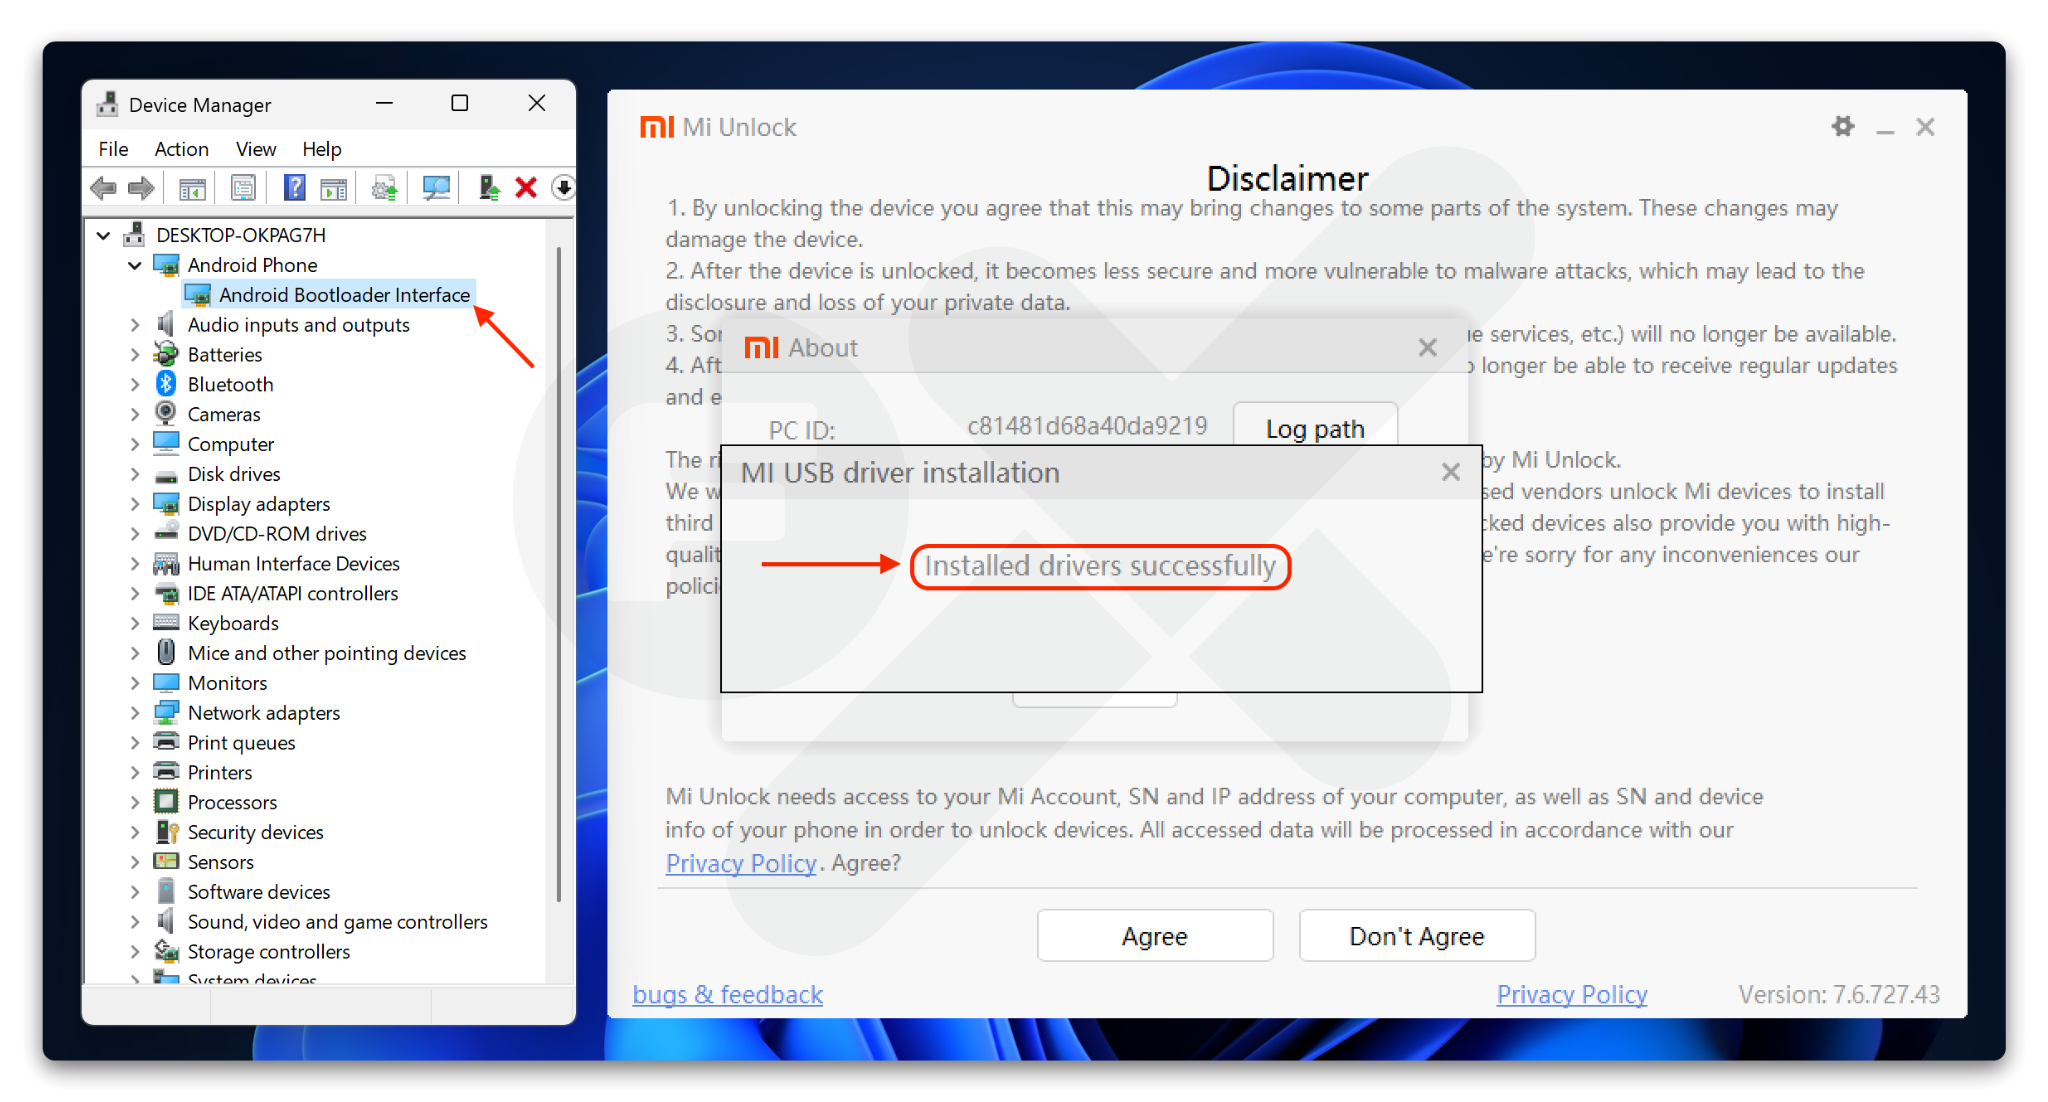
If the installation is successful, the display will look like the image below.
Then **Close** **Mi Unlock**.
#### Step 12
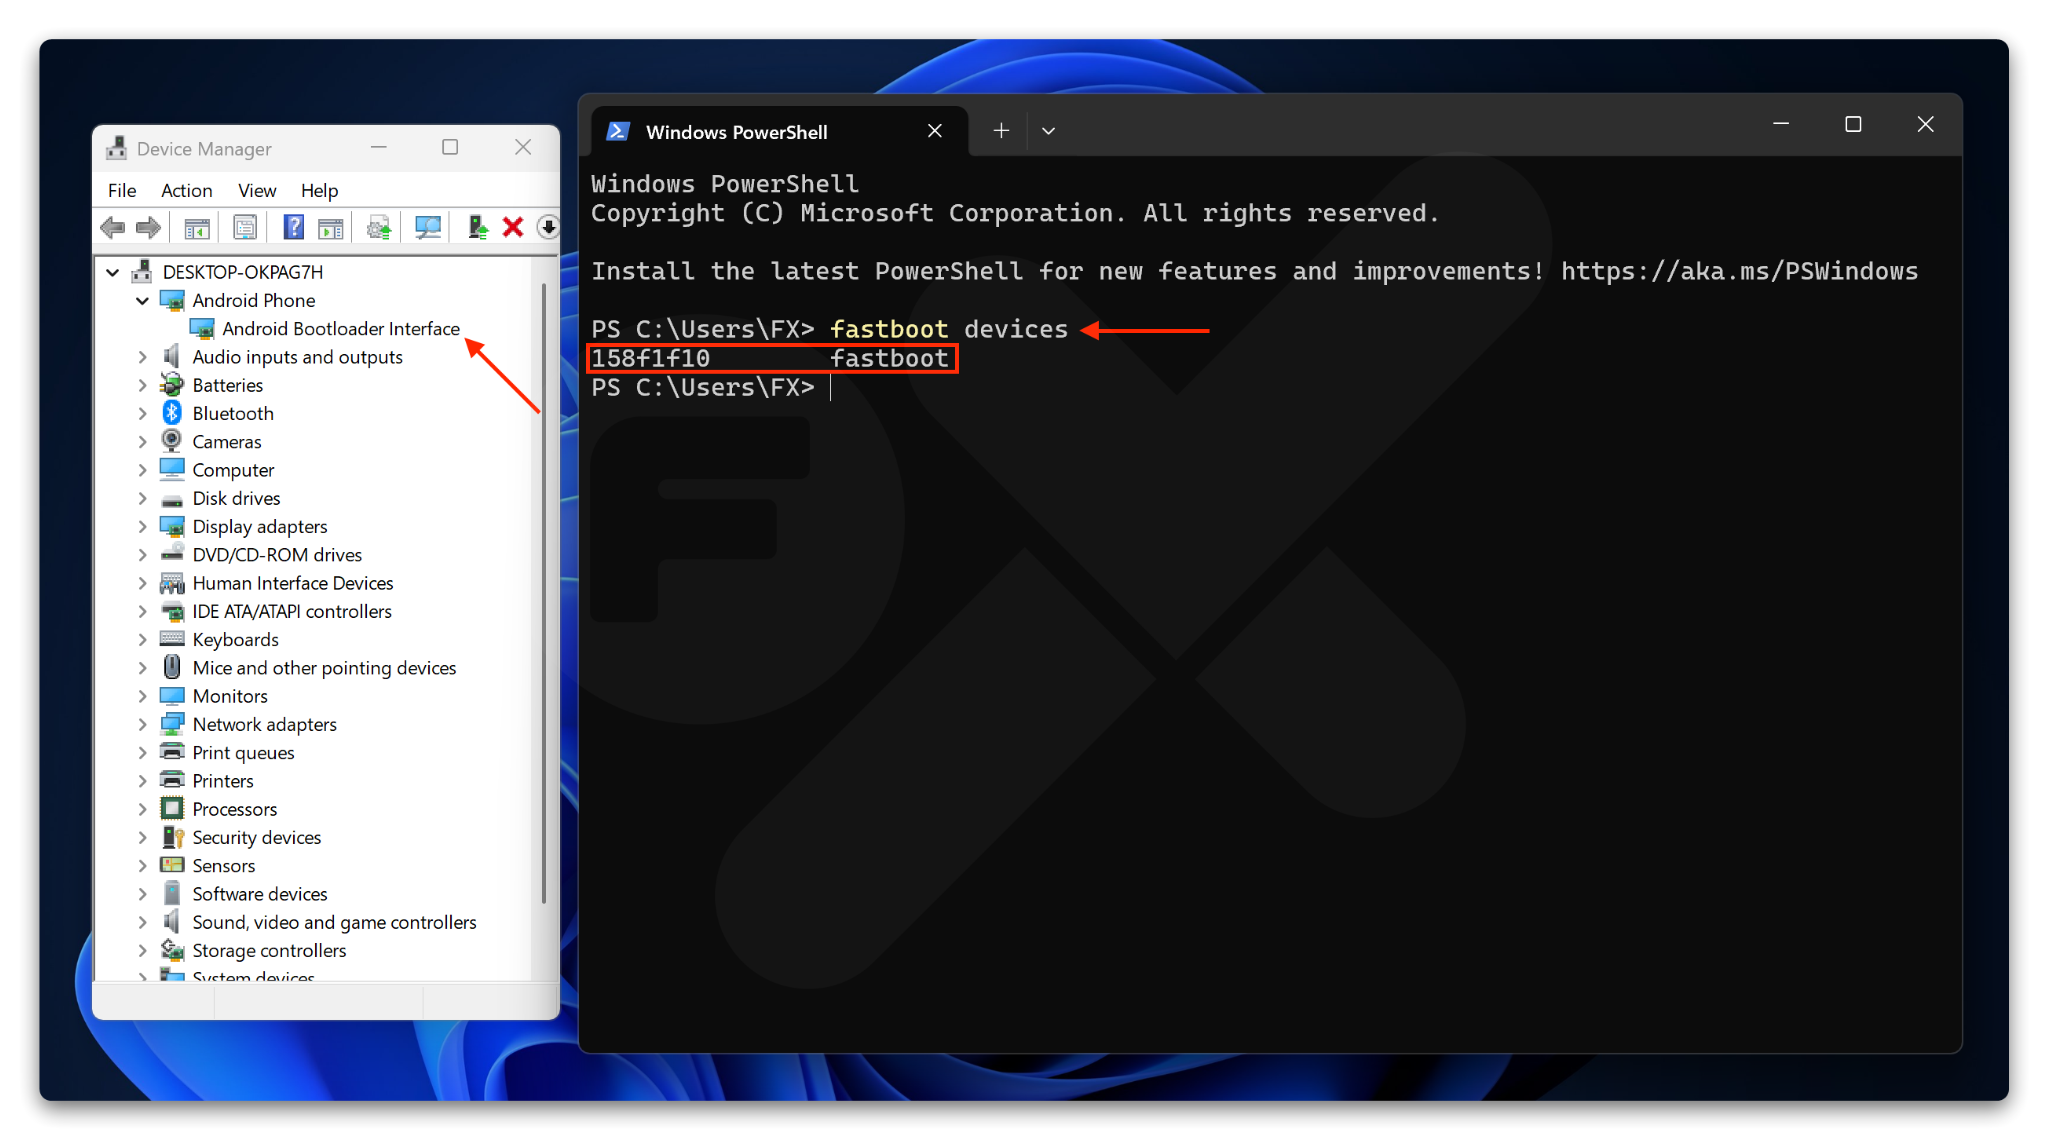
* Open Terminal / CMD
* Type the command: `fastboot devices`
If the result looks like this, you’re done 🎉.
### :apple: macOS
Read Tutorial
* Install [Homebrew](https://brew.sh/)
* Install ***Android platform tools***
```
brew install android-platform-tools
```
### :linux: Linux
Read Tutorial
**Install *****Android platform tools***** on your PC :**
Debian Base:
```
sudo apt install android-sdk-platform-tools
```
Arch-Linux Base:
```
sudo pacman -S android-tools
```
Red Hat Base:
```
sudo yum install android-tools
```
OpenSUSE Base:
```
sudo zypper install android-tools
```
---
# Agent Instructions
This documentation is published with GitBook. GitBook is the documentation platform designed so that both humans and AI agents can read, navigate, and reason over technical content effectively. Learn more at gitbook.com.
## Querying This Documentation
If you need additional information that is not directly available in this page, you can query the documentation dynamically by asking a question.
Perform an HTTP GET request on the current page URL with the `ask` query parameter:
```
GET https://faultx.gitbook.io/rn10p-docs/tools/adb-and-fastboot.md?ask=
```
The question should be specific, self-contained, and written in natural language.
The response will contain a direct answer to the question and relevant excerpts and sources from the documentation.
Use this mechanism when the answer is not explicitly present in the current page, you need clarification or additional context, or you want to retrieve related documentation sections.
 #### Step 2
Double click ➜ `adb-setup-1.4.3.exe`\
Then press the key ➜ **Y**\
\&#xNAN;*See the image below*
#### Step 2
Double click ➜ `adb-setup-1.4.3.exe`\
Then press the key ➜ **Y**\
\&#xNAN;*See the image below*

 #### Step 8
Click the :gear: icon (see the red circle)
#### Step 8
Click the :gear: icon (see the red circle)